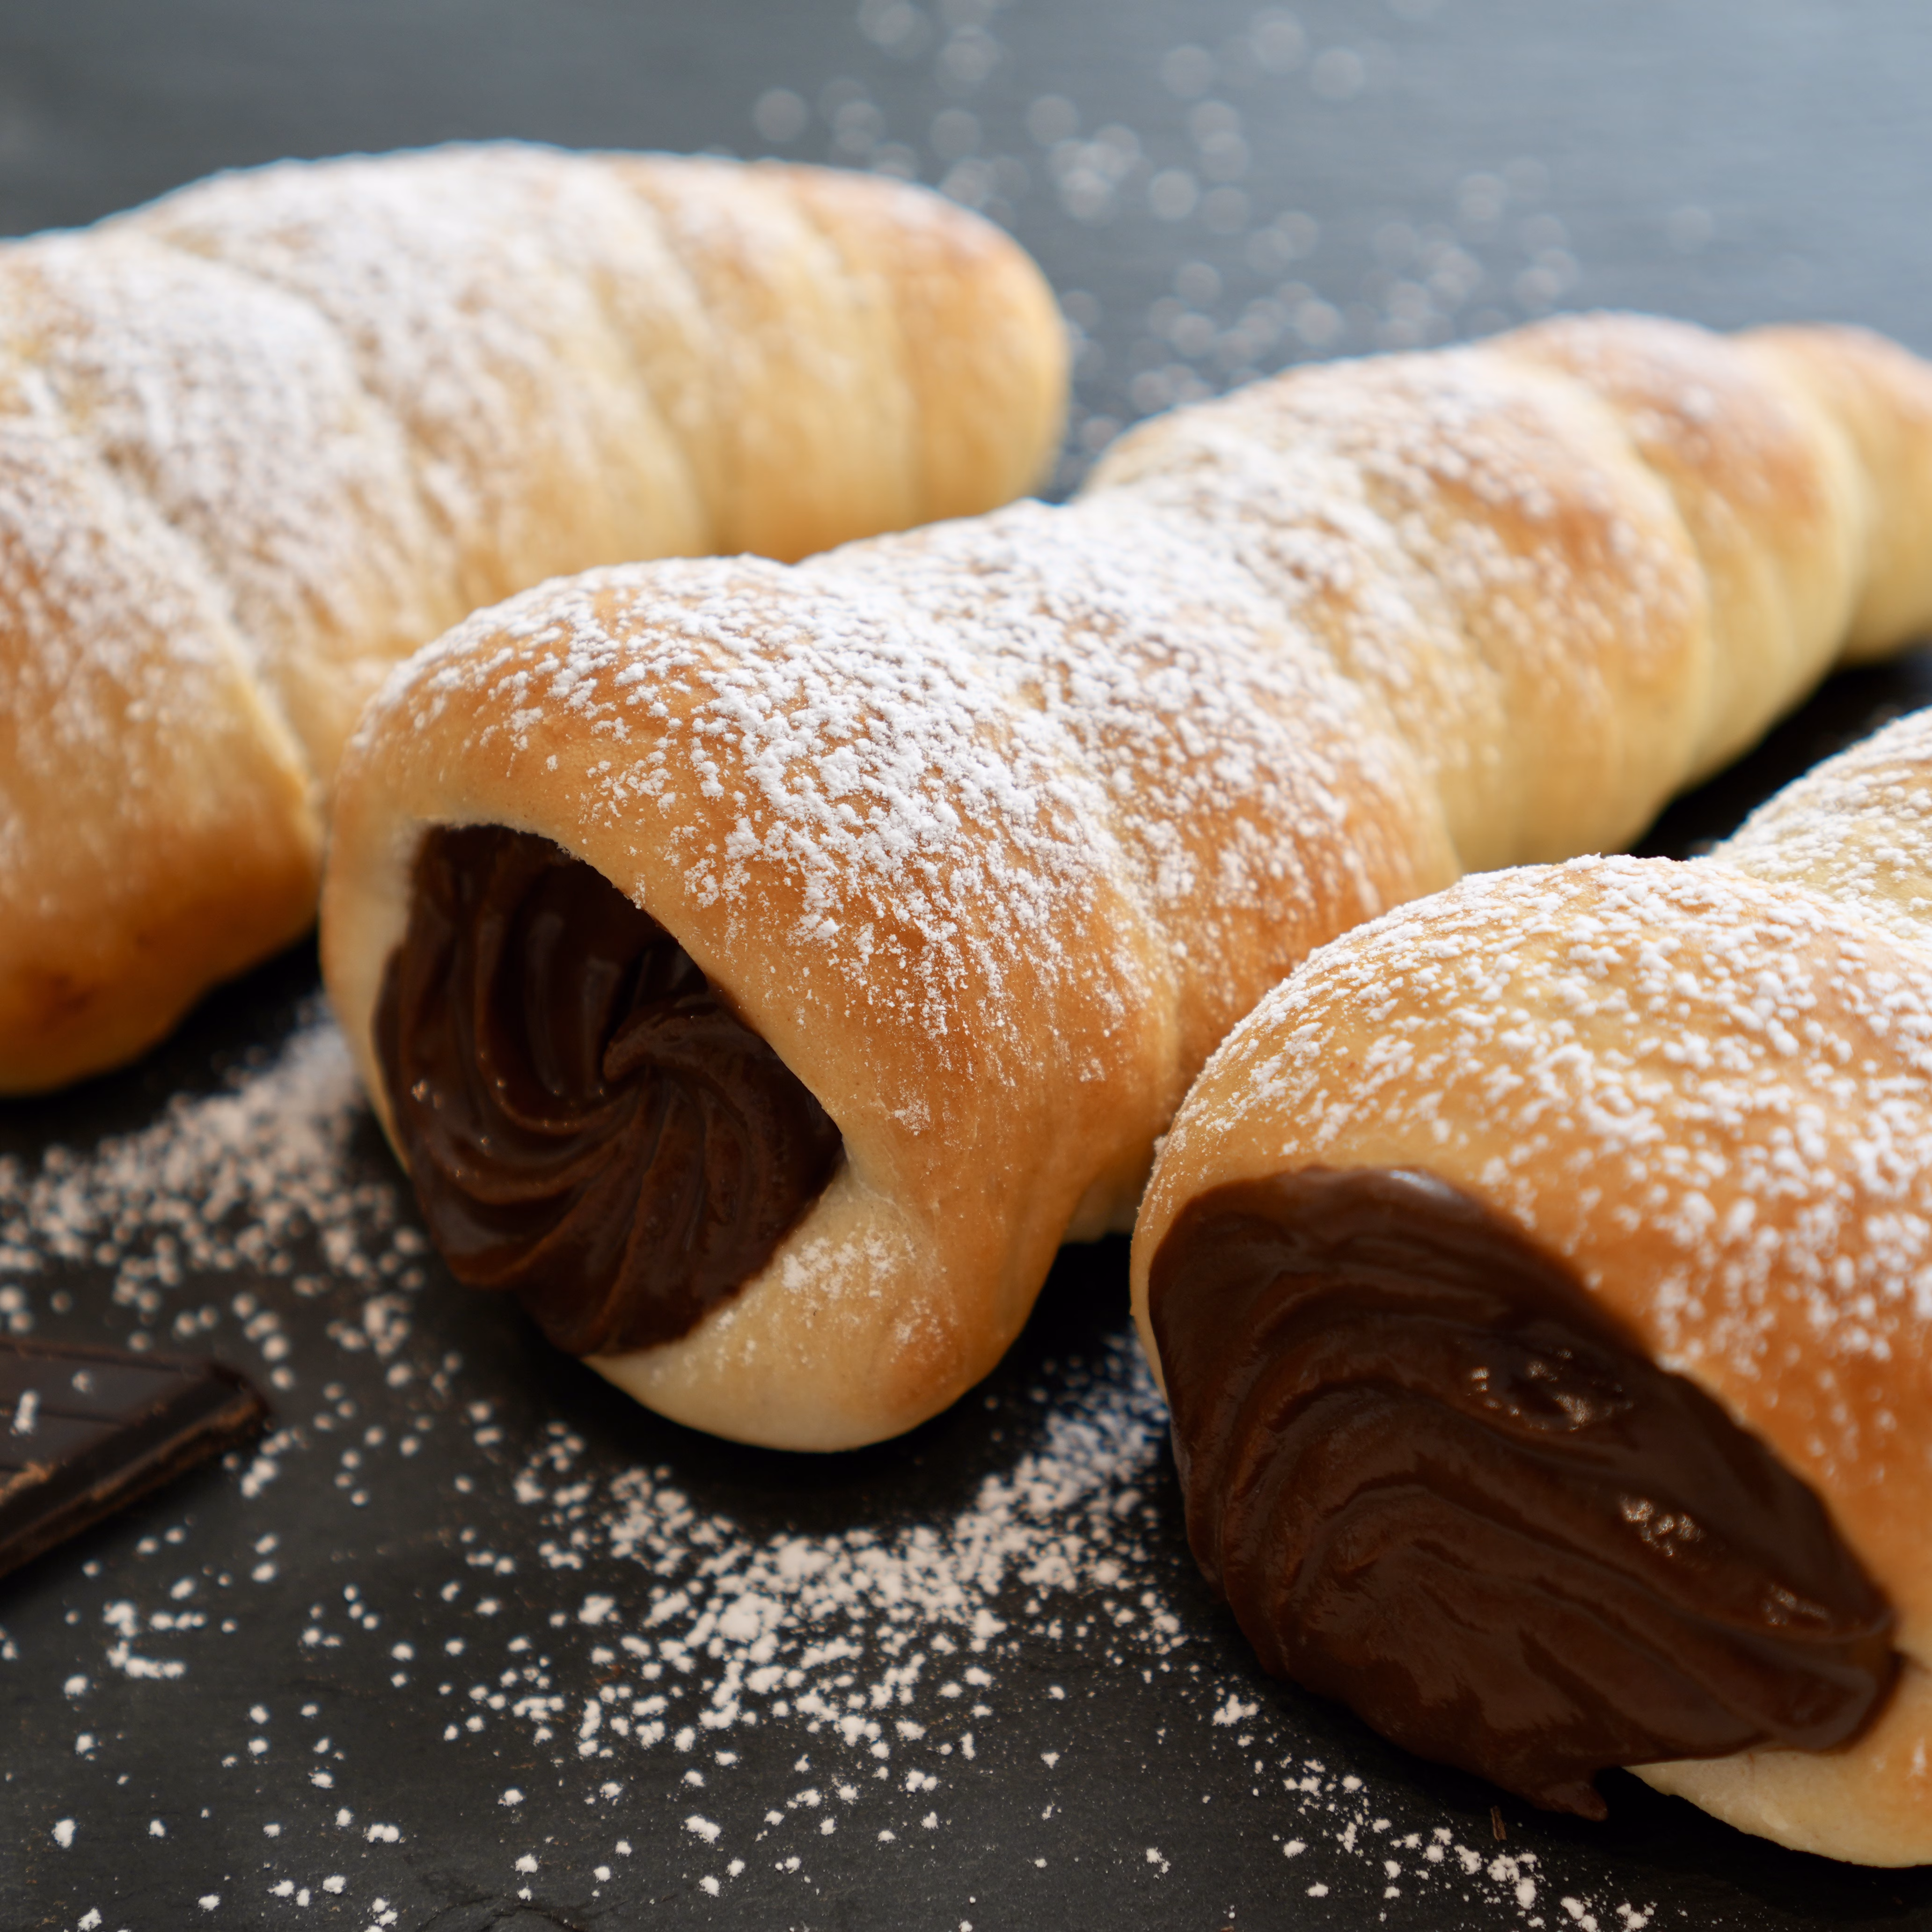
Vegan Chocolate Cornets (Japanese Cream Horns)
These vegan chocolate cornets are soft Japanese-style bread cones filled with rich dairy-free chocolate pastry cream. The dough is made completely by hand, no stand mixer needed, then wrapped around cone molds and baked until golden. They take a little patience because of the rising and chilling time, but the finished pastries feel properly bakery-style. Also try my Vegan Chocolate Cake, Vegan Chocolate Filled Vanilla Cupcakes, or Vegan Vanilla Buttercream.

Vegan Chocolate Cornets (Japanese Cream Horns)
Soft Japanese-style bread cones filled with rich vegan chocolate pastry cream. These dairy-free chocolate coronets are fluffy, glossy and fun to make at home.
Ingredients
Chocolate Pastry Cream
- 300 ml (1¼ cup) Oat milk (or soy milk for richer result)
- 60 g (¼ cup + 1 tablespoon) Superfine (granulated) sugar
- 30 g (¼ cup) Cornstarch
- 20 g (¼ cup) Cocoa powder (Dutch-process)
- 60 g (about ⅓ cup ) Dark chocolate, chopped
- 20 g (1 tablespoon + 1 teaspoon) Vegan butter
- 1 teaspoon Vanilla extract
- Pinch Salt
Coronet Dough
- 300 g (2 cups + 2 tablespoons) Bread flour (or all-purpose) Bread flour gives more stretch
- 1½ teaspoon Instant yeast
- 40 g (3 tablespoons) Superfine (granulated) sugar
- 1 teaspoon Sea salt
- 195 ml (¾ cup + 2 tablespoons) Oat milk, warm (38–42°C /100–108°F)
- 50 g (3½ tablespoons) Vegan butter, softened to room temp Must be very soft, almost paste like
- 45 ml (3 tablespoons) Aquafaba (liquid from canned chickpeas)
Instructions
Chocolate Pastry Cream
- In a medium saucepan, whisk together sugar, cornstarch, cocoa powder, and salt until no lumps remain.
- Gradually add oat milk while whisking to incorporate smoothly.
- Cook over medium heat, stirring constantly, until mixture thickens, about 5–7 minutes. Do not stop stirring.
- Remove from heat as soon as mixture thickens.
- Add the chopped dark chocolate, vegan butter, and vanilla extract.
- Stir until fully melted and glossy.
- Pour into a bowl, press plastic wrap directly onto the surface (this prevents a skin from forming).
- Refrigerate for at least 2 hours (or up to 2 days).
Coronet Dough
Step 1 — Mix the Dough
- In a large bowl, whisk together the flour, yeast, sugar and salt until combined.
- Pour in the warm oat milk and aquafaba.
- Use a spatula or your hand to mix until no dry flour remains – it will look rough and wet.
- Cover the bowl and let rest for 10 minutes (autolyse). This rest allows the flour to fully hydrate and kick-starts gluten development.
Step 2 — Initial Knead, No Butter Yet
- Keep the dough in the bowl.
- Wet hands (no flour) to prevent sticking during this step.
- Squeeze the dough repeatedly through your fingers from one end to the other for 2 minutes. This develops gluten quickly in a wetter dough.
- Then switch to folding: grab one side of the dough, stretch it up, and fold it over to the opposite side. Rotate the bowl 90° and repeat. Do 8–10 folds.
- Rest 2 minutes, then repeat the folding set once more. Do not add flour.
- Cover the bowl and rest for 5 minutes.
Step 3 — Add the Butter
- Flatten the dough slightly in the bowl.
- Spread ⅓ of the softened butter (~1¼ tbsp) across the surface.
- Fold and squeeze the dough to incorporate – it will feel greasy and may try to separate. Keep going.
- Once mostly absorbed, add another ⅓ of butter. Repeat.
- Add the final ⅓ of butter. Continue folding and pressing for 5–6 minutes until fully absorbed.
Step 4 — First Rise with Stretch-and-Fold
- Cover the bowl tightly with plastic wrap or a damp tea towel. Let it rest 20 minutes.
- Then, perform 3–4 sets of stretch-and-fold, spaced 20–25 minutes apart:
- With wet hands, grab one side of the dough, stretch it up as high without tearing, and fold it over to the opposite side.
- Rotate the bowl 90° and repeat (4 folds = 1 set).
- After the final fold set, cover and leave the dough undisturbed until doubled in size, about 60–75 minutes total from when you covered it.
Each fold set builds gluten strength without any kneading. By the 3rd set the dough will feel dramatically tighter and more pillowy.
Step 5 — Divide & Shape
- Gently punch down the risen dough to release gas.
- Turn onto an unfloured surface and divide into 8 equal pieces (~70 g each). Use a kitchen scale for accuracy.
- For each piece, flatten into a rough oval, then roll into a rope about 40 cm (16 inches) long, slightly thinner at one end
- Wrap around the greased cone mold starting at the tip, spiraling upward with slight overlap.
- Pinch the wide end firmly to seal.
- Place seam-side down on a lined baking sheet.
No cone molds? Roll a double-thick sheet of aluminum foil into a cone shape,approximately 12 cm long and 4 cm wide at the base. Wrap tightly and grease the outside.
Step 6 — Second Rise
- Cover the shaped coronets loosely with oiled plastic wrap or a damp cloth. Let proof until visibly puffed, about 30–40 minutes.
Step 7 — Bake
- Preheat oven to 375°F (190°C).
- Brush with oat milk + maple syrup wash (2 tablespoons oat milk + 1 teaspoon maple syrup).
- Bake at 375°F (190°C) 12-15 until golden brown.
- Remove from oven and let cool for 5 minutes, then carefully twist and pull the molds out while the pastry is still slightly warm. (If you wait too long, they can stick.)
- Let the shells cool completely on a wire rack before filling – at least 30 minutes.
- Step 8 — Fill & Serve
- Transfer the chilled chocolate pastry cream to a pastry bag fitted with a round or star tip.
- Insert the tip into the wide end of each cooled coronet shell and pipe generously, working from the tip toward the opening.
- Dust lightly with powdered sugar or cocoa powder if desired.
- Serve immediately or refrigerate for up to 24 hours.
Video
Notes
The chocolate pastry cream can be made up to 2 days ahead. Keep the filled coronets refrigerated and serve within 24 hours for the best texture.
Suggested recipes
If you liked this recipe, try these next:
- Vegan Chocolate Pumpkin Loaf
- Vegan Chocolate Pear Cake
- Vegan Chocolate Cake In Air Fryer
- Vegan Chocolate Lava Cake In Air Fryer